Hawaiian Roll Sliders (Ham & Cheese)
These Hawaiian roll sliders with ham and cheese make an easy dinner or the perfect game-day snack!
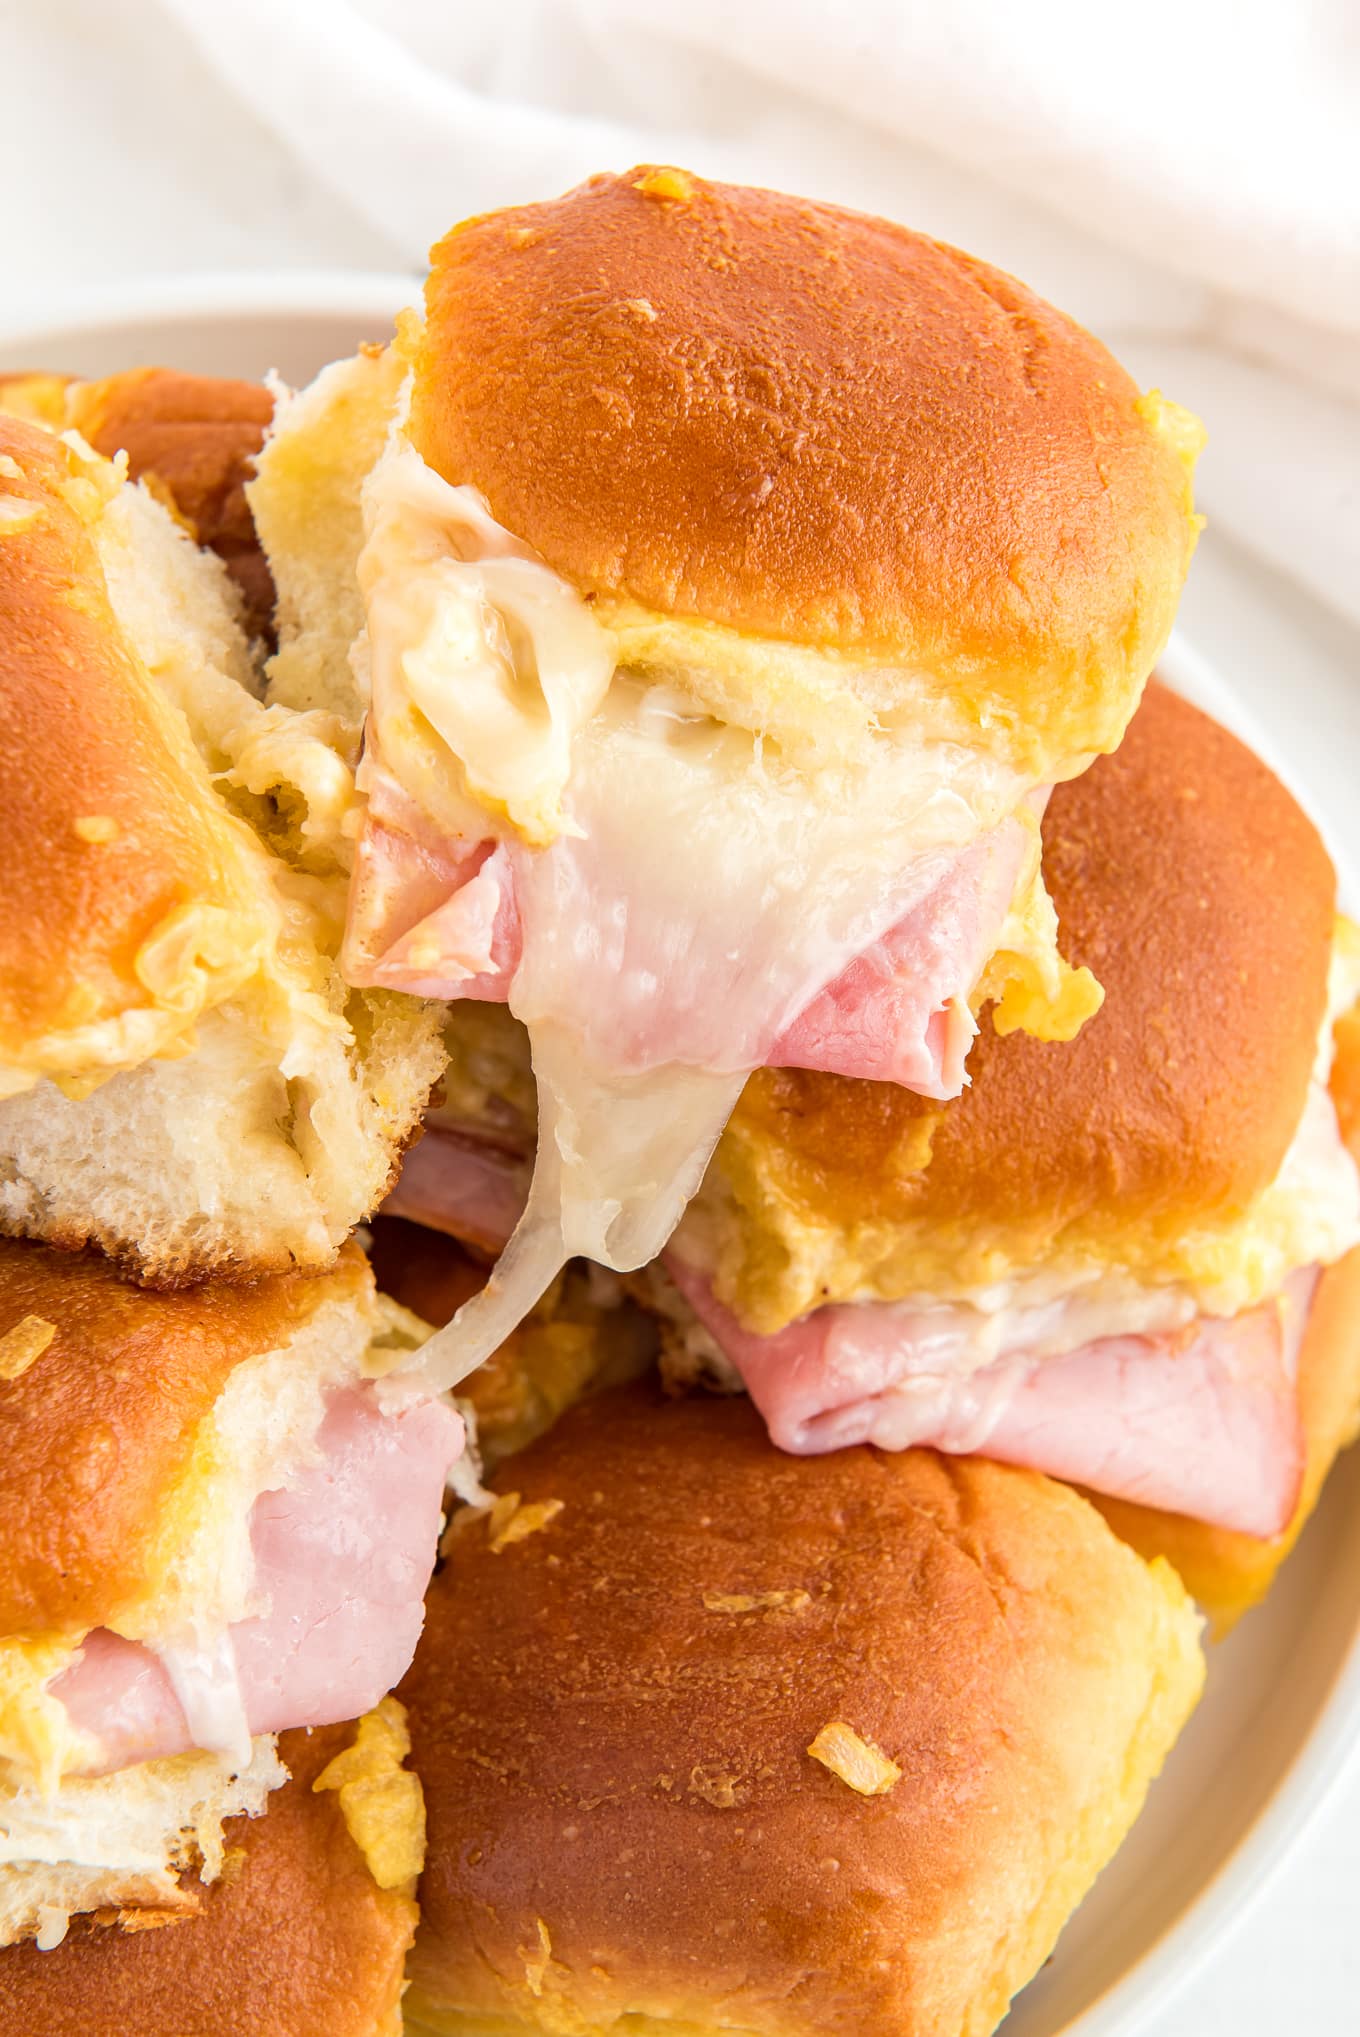
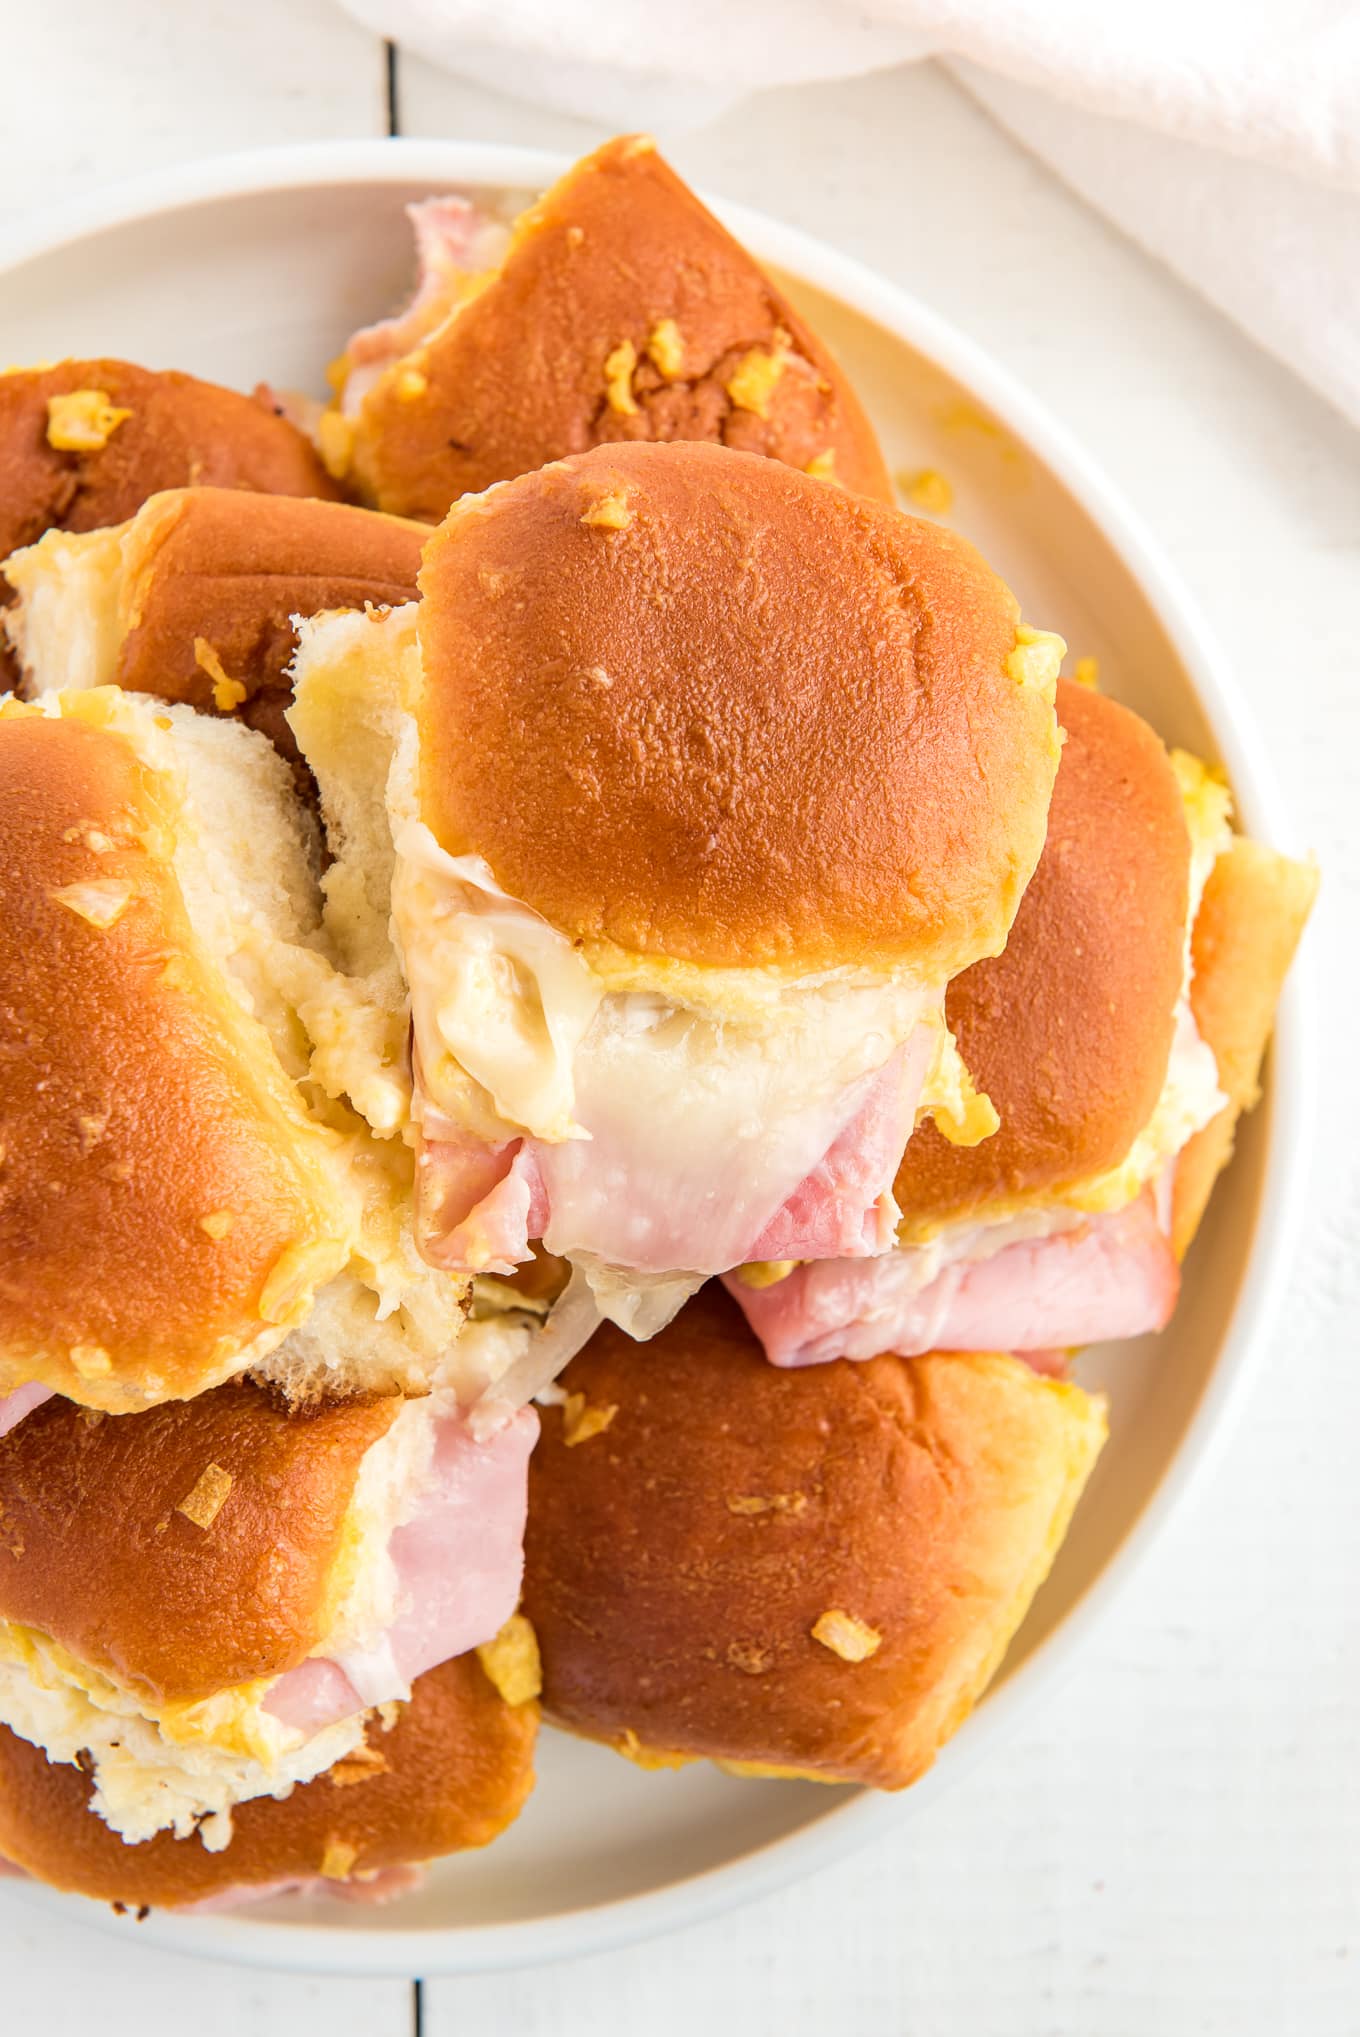
King’s Hawaiian rolls topped with deli ham and sliced Swiss cheese. The rolls are brushed with a delicious brown buttery glaze and the best part they only take 15 minutes to make!
Looking for more slider recipes? Try Turkey Sliders, Pulled Pork Sliders, and Meatball Sliders.

Table of contents
King’s Hawaiian Sliders
Whether you need an under 30 minute dinner recipe or a tailgating or holiday party comfort food, these hot ham and cheese sliders will definitely be a hit with everyone.
- Switch up the deli meat. I love that you can add your favorite deli meat. We love turkey and roast beef and sometimes I put all 3 on the sliders for a “club style sandwich” slider.
- Feeds a crowd. It makes 12 sandwiches but most people have 2-3. So I always double or triple this recipe if I’m making it for game day.
- Just like the meat, you can change up the cheese. I like cheddar, mozzarella, provolone or if you’re looking for a little kick, pepper jack cheese is amazing with roast beef.
- I don’t like poppyseeds, so I don’t add them to my buttery glaze but if you love poppyseeds…add about 2 teaspoons of poppyseeds to the butter glaze. You can also add everything bagel seasoning too.
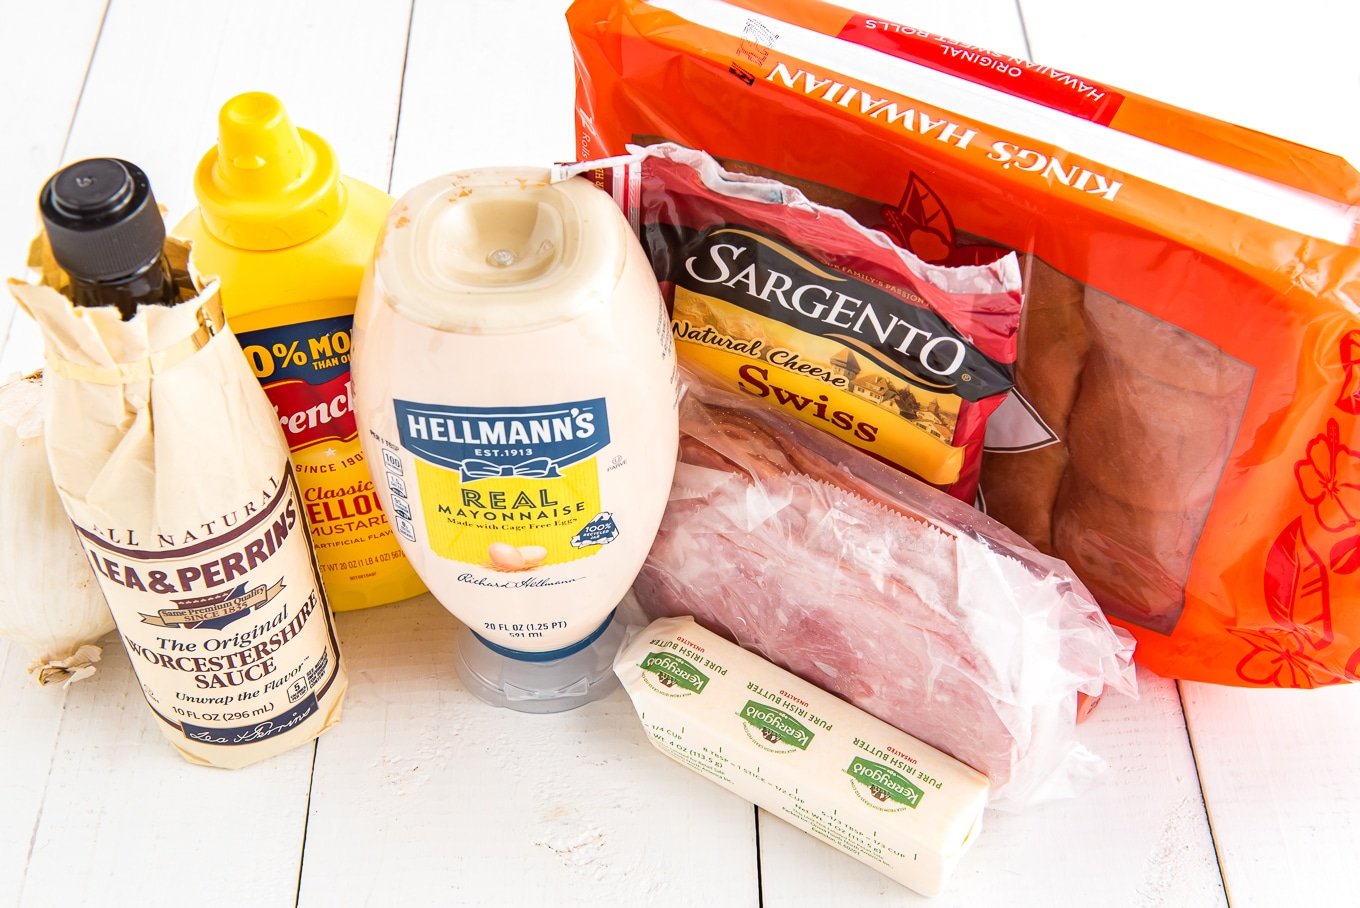
Ingredients For Ham and Cheese Sliders
- Hawaiian Rolls: I love using King’s Hawaiian Sweet Rolls because they have the best flavor. But you could use slider buns or dinner rolls.
- Ham: You can use any type of ham. I like to use Black Forest ham but you could use honey ham or even leftover crockpot ham from Christmas/Easter.
- Cheese: I used Swiss cheese but you can use any cheese you like. Can’t go wrong with cheese.
- Mayo: I add mayo to the bottom layer but you could use butter or just keep it plain.
- Buttery Glaze: I use yellow mustard, minced onions, Worcestershire sauce and of course, melted butter. It’s honestly the best, so delicious. You could also add garlic powder if you like garlic.
How To Make Hawaiian Roll Sliders
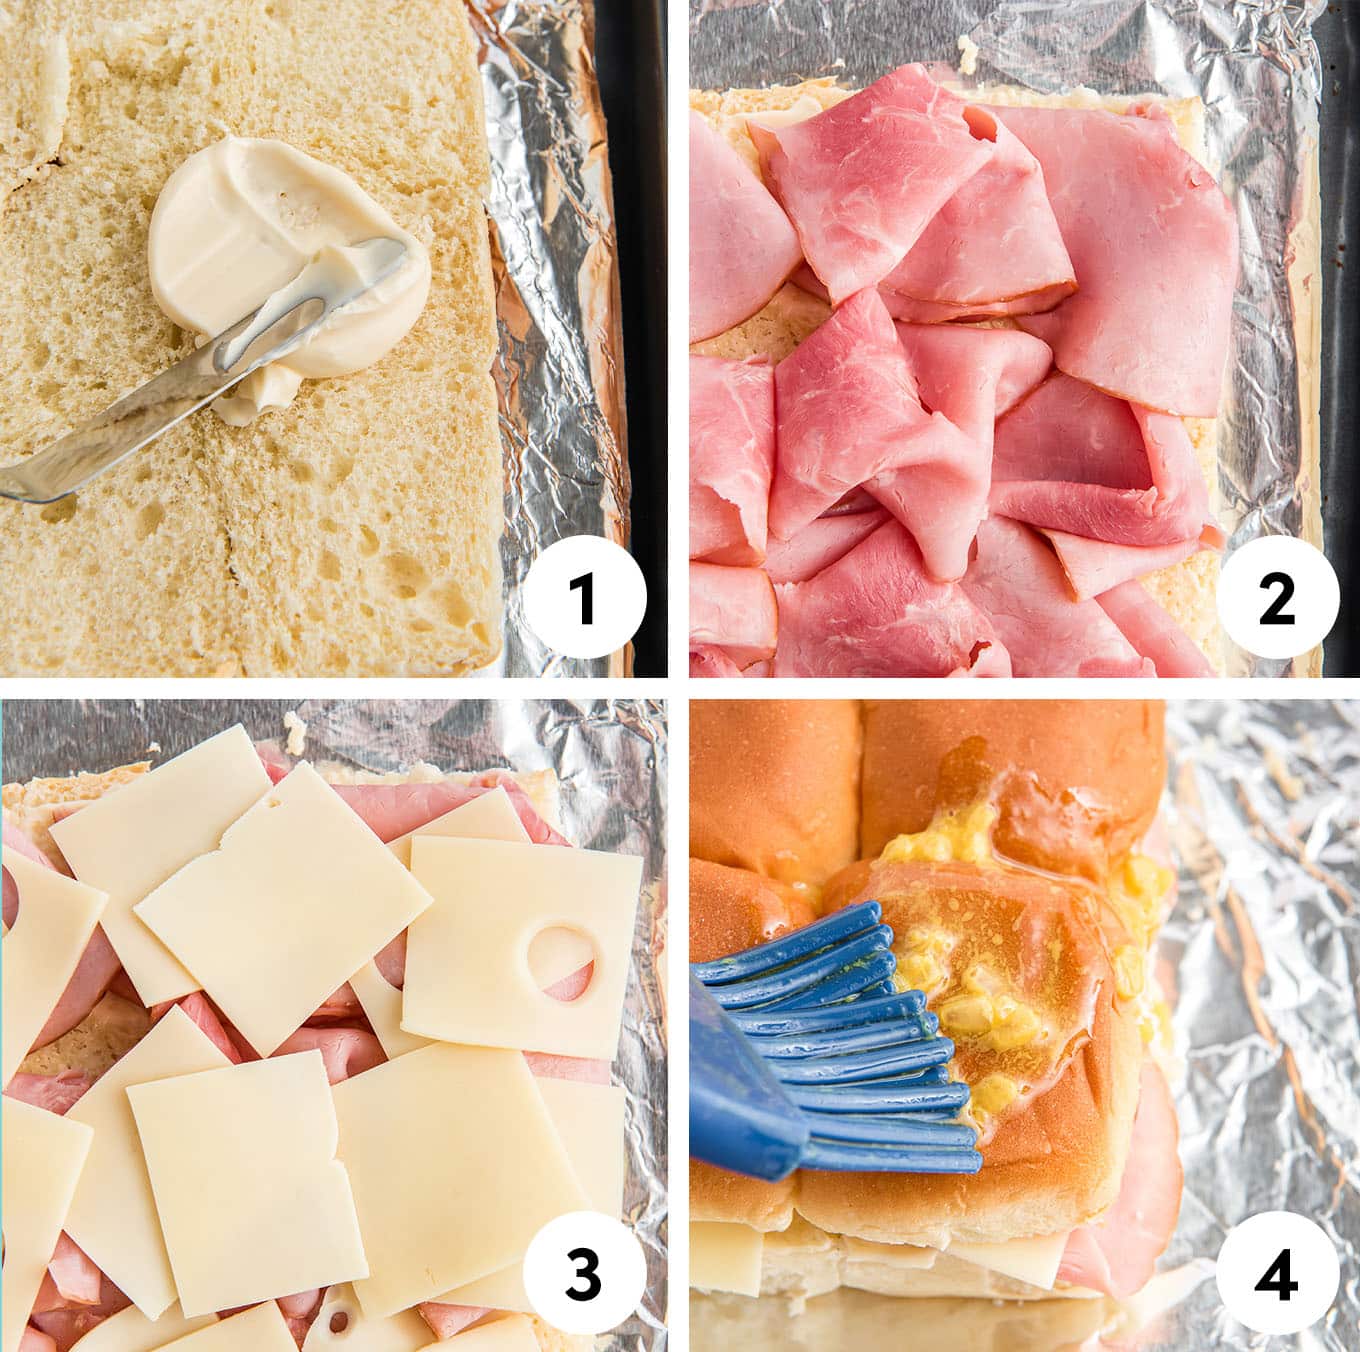
- Baking Sheet. Line a large baking sheet with aluminum foil or you can use a large baking dish too.
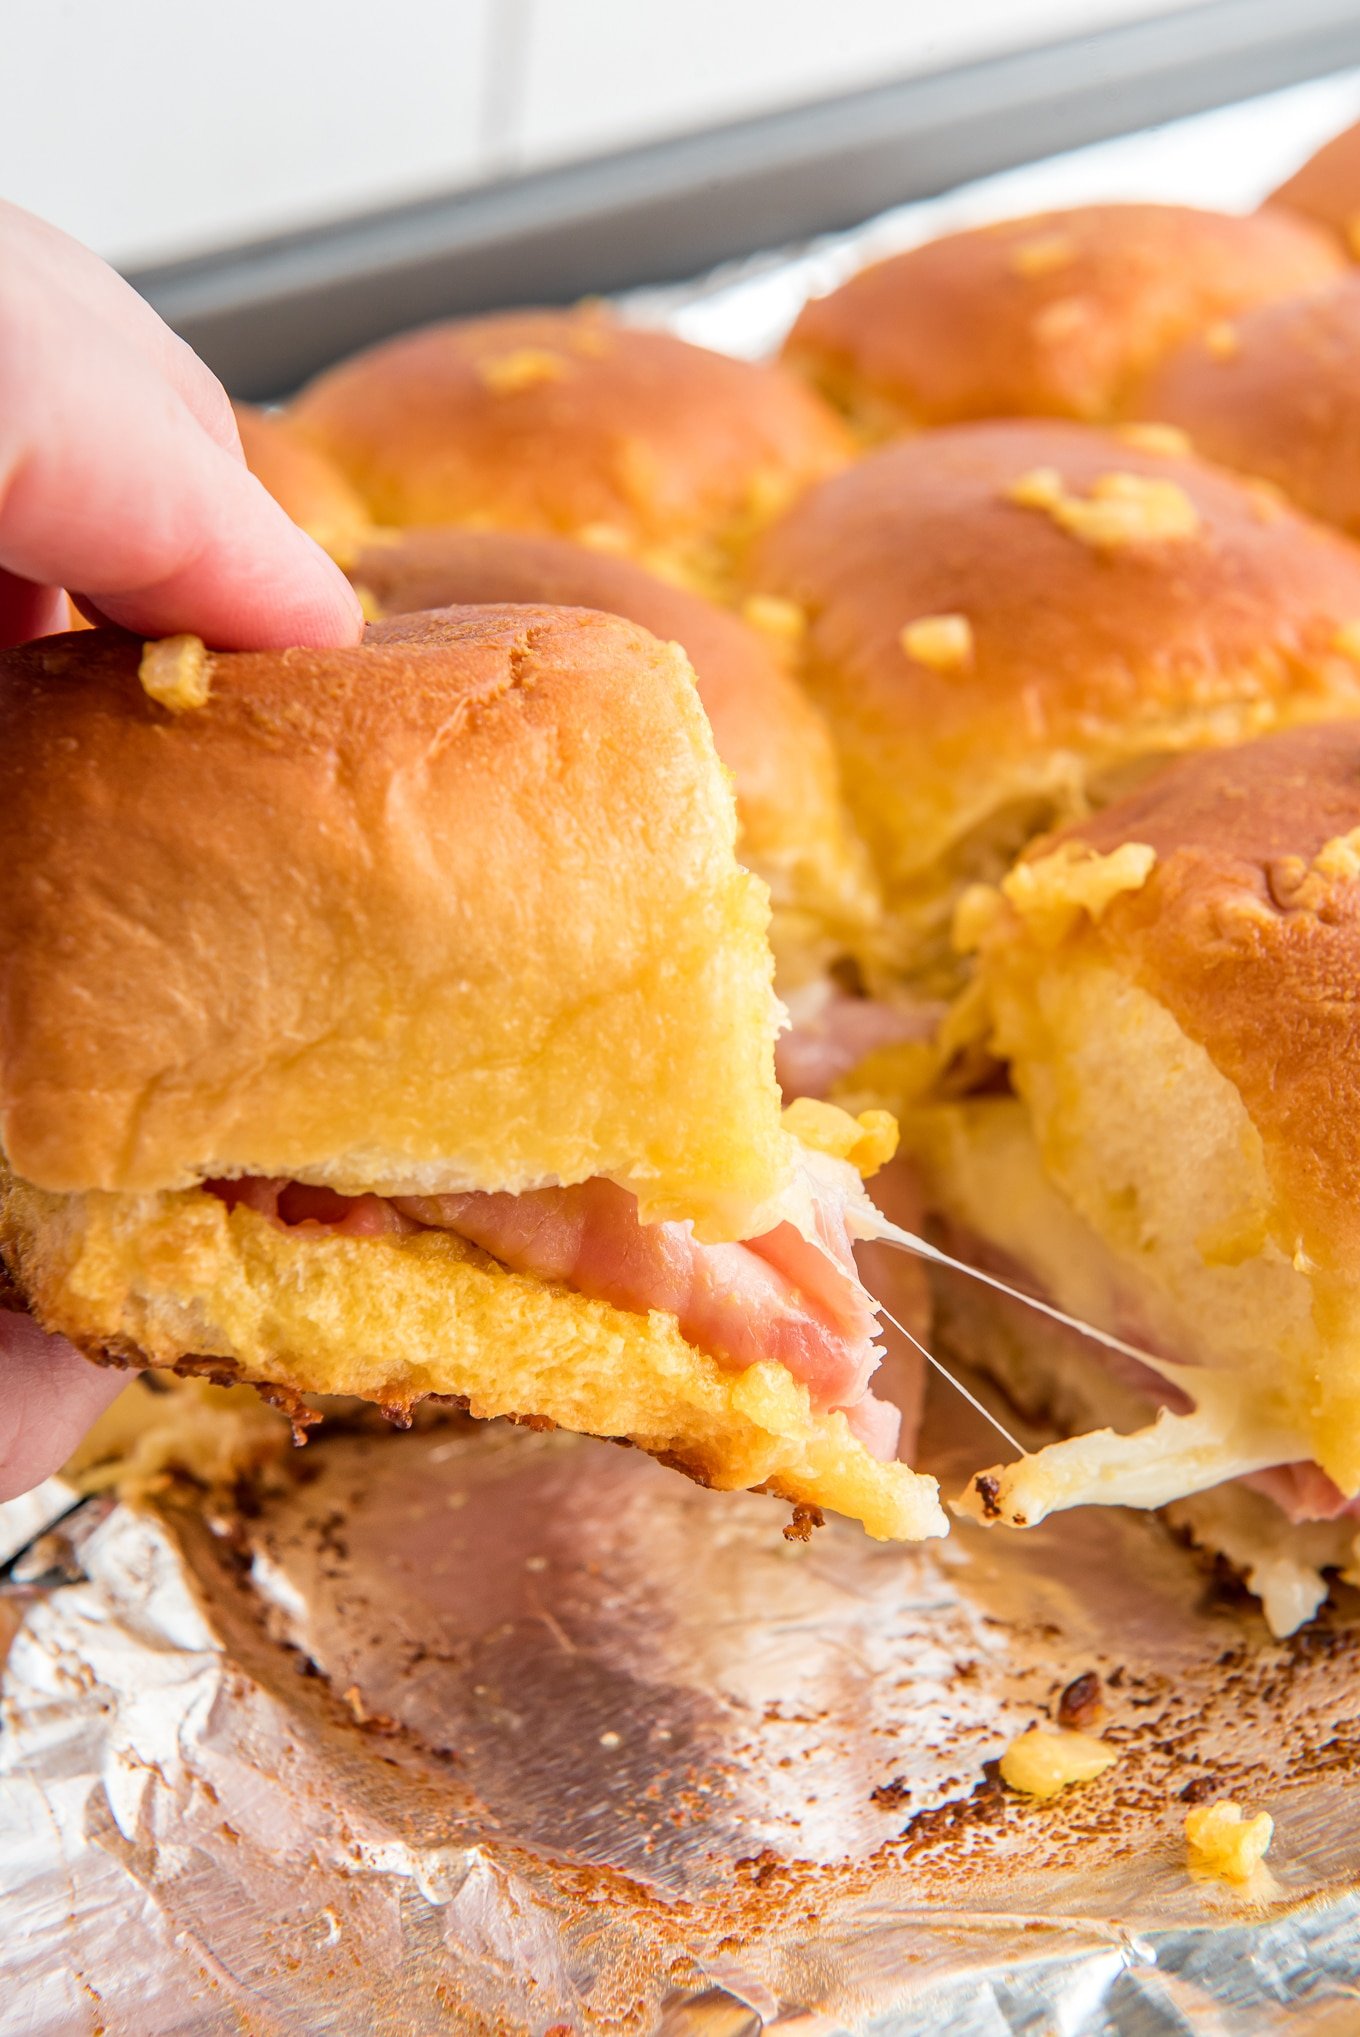
- Cut. Using a bread knife, cut the Hawaiian rolls in half so you have a top and bottom but don’t separate the buns.
- Spread. Evenly spread the mayo onto the top and bottom of each half. Place bottom half onto the baking sheet.
- Add. Place the ham and Swiss cheese on top of the bottom half of the buns.
- Make Buttery Glaze. Whisk together all the ingredients and brush on top of the buns. If you don’t have a brush, you can drizzle the buttery glaze on top of the buns.
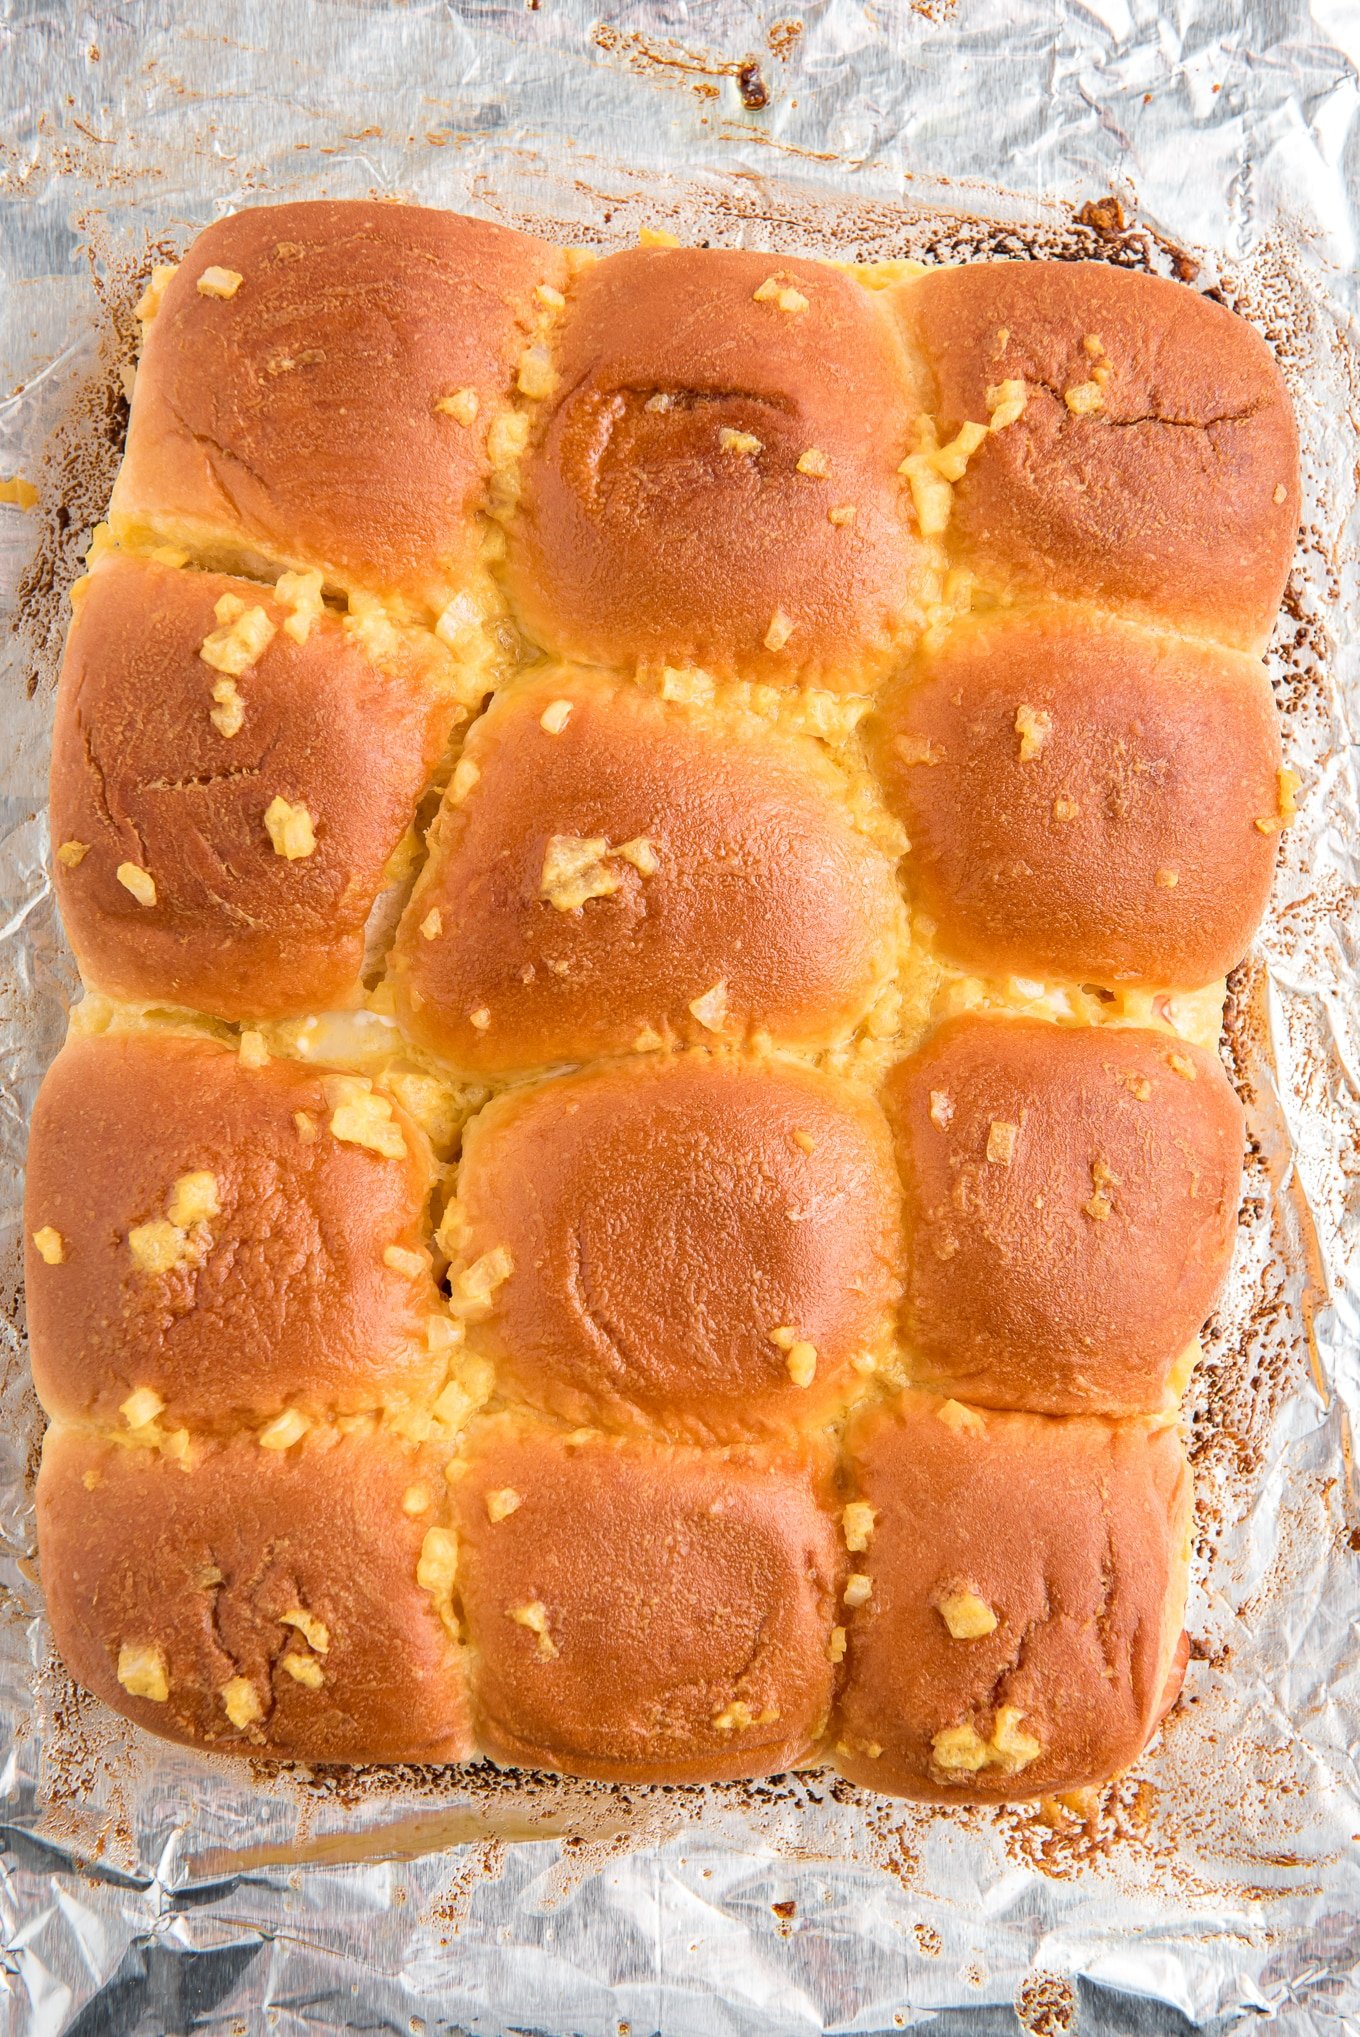
- Bake. Bake for 12-15 minutes or until the tops of the buns are lightly toasted.
Expert Tips
- Easy to pull apart. To make it easy to pull the sliders apart, place a slice or two of folded ham on each roll instead of layering the slices across the entire bottom half.
- Eat them right away. These sliders are best when you eat them right out of the oven.
- Make ahead. You can make these sliders ahead of time, just wait to brush the buttery glaze until ready to bake them or the buns will get soggy.
Recipe FAQs
Brush the buttery glaze on the sliders right before you put them into the oven. If you let the buns soak up the buttery glaze without putting them in the oven immediately the sliders will be soggy. Also, don’t cover the sliders with foil…just keep an eye on them to make sure the tops don’t burn.
These sliders shouldn’t sit out for more than 2 hours.
Yes, reheat them in the microwave for about 15 seconds. You can also heat them in the oven at 300°F for about 5-7 minutes or until warm. If the tops are starting to burn, cover lightly with foil.
What To Serve With Ham and Cheese Sliders
If you’re serving these sliders as an appetizer, try pairing them with:


If you’re serving these sliders for lunch or dinner, try pairing them with:
- Air Fryer French Fries
- BLT Pasta Salad
- Roasted Potato Salad
- Green Beans
- Baked Beans
- Potato Salad
- Air Fryer Corn on the Cobb
- Coleslaw
And don’t forget dessert!


Storing & Reheating
- Store. If you have any leftover sliders, they can be stored in an airtight container for up to 4 days in the refrigerator.
- Reheat leftovers. Reheat them in the microwave for about 15 seconds. You can also heat them in the oven at 300°F for about 5-7 minutes or until warm. If the tops are starting to burn, cover lightly with foil.
More Sandwich Recipes


Hawaiian Roll Sliders Recipe (Ham & Swiss)
Ingredients
- 12 Hawaiian rolls
- 12 slices of deli ham
- 8 slices of swiss cheese
- ¼ cup mayo
- ½ Tablespoon yellow mustard
- ¼ cup melted butter
- 1 Tablespoon minced onions
- ½ teaspoon Worcestershire sauce
Instructions
- Preheat the oven to 350°F. Line a large baking sheet with aluminum foil or you can use a large baking dish too.
- Using a bread knife, cut the Hawaiian rolls in half so you have a top half and bottom half but don’t separate the buns.
- Spread mayo on the top half and bottom half. Place the bottom half onto the prepared baking sheet or baking dish.
- Place a slice of ham and a slice or half of a slice of cheese on each roll. This will make it easier to pull the sliders apart after they bake. Place the top half on top of the cheese.
- In a small bowl. Whisk together the yellow mustard, melted butter, minced onions, and Worcestershire sauce.
- Brush the sauce mixture on the top and sides of each sandwich. If you don't have a brush, you can drizzle the buttery glaze on top of the buns.
- Bake uncovered for 12-15 minutes or until the tops of the buns are toasted. Serve immediately.
Notes
- Store. If you have any leftover sliders, they can be stored in an airtight container for up to 4 days in the refrigerator.
- Reheat leftovers. Reheat them in the microwave for about 15 seconds. You can also heat them in the oven at 300°F for about 5-7 minutes or until warm. If the tops are starting to burn, cover lightly with foil.
Some of the links above are affiliate links, which pay me a small commission for recommending my favorite products at no extra cost to you! Thank you for supporting Deliciously Sprinkled.
My kids love these so much, and they are constantly begging me to make them for dinner! My husband loves them as well! I love how easy they are to throw together!
Seriously, that buttery glaze took this over the top. Don’t know why I never did that before!
Oh my goodness, my kids gobbled these UP! I think I’m going to make them again for an after school snack next week when their friends come over.